MERRY CHRISTMAS! · 25 DECEMBER 2011
I had a good amount of time off in December, and while I took my portable hard drive with me to visit my parents, I didn't get any work done on this project. Instead I spent a good deal of time converting my main site's videos to Vimeo after I discovered my Quicktimes were having problems on the iPad and latest iOS iPhones. Both Flash and Quicktime were loading terribly slow from my host while in Virginia as well, which is strange since they load great from Texas. I couldn't figure out what was going on and eventually just gave up and signed up for Vimeo since they should be able to handle streaming the videos all over the world. I actually like the service quite a bit and it's very easy to embed videos. However, I still plan to keep most of the videos on this site in Flash format. There is a slight possibility I may change my mind on that, but right now, it's easier to control with just one format. My main site actually supports three throught the advanced options.
FALL SLUMP · 3 NOVEMBER 2011
Seems like every year around this time(actually starting late August) I run out of steam and take a huge break from the project. I think it's a combination of football season starting and too many games coming out that I want to play. I worked pretty hard during the winter, spring, and summer getting sequence 2's rendering done as well as crunching on Rage. I definitely wanted to take a break in August, but that sort of lead to September, then Rage came out in October and the next thing you know, it's my three year anniversary of being at id software today. I hate to take huge breaks like this, but sometimes, I just can't muster up the energy to be creative. I've had enough time away and hopefully in the coming weeks I can begin to start on sequence 3's animation. A few months ago, I did begin converting to Maya 2012. It's a bit of an odd look since I'm so use to the 2009/10 look, but I really should jump in. I didn't want to switch in the middle of rendering the hallway sequence, but now that the intial part is done, I think it might be safe to move on. I also spent the last few weeks of October getting my RAGE ANIMATION GALLERY together. Getting that up and running with both quicktime and flash videos, as well as a mobile version was actually a monumental effort. Three years worth of footage, and I still have to figure out how to use parts of it in my demo reel. I really needed to do that before too much time past. I probably should have been getting it together the whole time. Even though I had been collecting the videos, converting them properly was actually a huge pain in the butt since many were divx format. Not very good for editing. I suppose I'm giving myself a slight pass for at least doing that. However, three whole months went by with nothing to show for this short.
RAGE · OCTOBER 2011
After almost three years of working at id software, RAGE finally came out this month. I'm not going to write too much about it here, but the weeks surrounding the release were a bit of a mixed bag for me and I definitely didn't have the inspiration to work on this short. I did however play RAGE twice. Once on my old HDTV and once on my new HDTV. I wasn't planning to do the second playthrough, I mean, I've been playing various parts for three years, but once I saw it on my new screen, I couldn't stop. I still love the game, even with its shortcomings. Hopefully, the "next" game will be even better.
FINAL FANTASY VIII · SEPTEMBER 2011
Yes, I added another "I" to Final Fantasy, in case it wasn't noticeable. After playing VII, I had to play VIII. I remember the awesome cinematics back in 1998 or 1999, and always wanted to see what it was about. I had a week off from work and started playing. It was great but very different from VII. I thought I could finish it quickly since I had so much free time, unfortunately, the end section destroyed me and it took me much longer to "learn" how to play. When I did finally finish it, the whole end game was just epic, both the battles and the cinematic. Unfortunately, I didn't spend any time working on this short.
FINAL FANTASY VII · AUGUST 2011
No work was done on this project during the month of August. However, I did manage to play Final Fantasy VII, and I think that ought to count for something. I bought the game for PC in the late 90s, but recently got it for PS3 and I have to say, it was quite a game. I'm glad I "finally" put the time in to play it. Of course, that just led to...
EH OH...A...O! · 24 JULY 2011
A couple of weeks ago I showed the rendered hallway sequence to two of my friends who work in different areas of cg. They both had similar comments that the rendering was not up to current day standards. Needless to say, after doing all that work, it was pretty deflating to hear. However, I cannot disagree either since I know that surfacing and texture painting is something I struggle with. On the other hand, I did feel that I had some control over the lighting. One of their suggestions was to add some ambient occlusion, AO. I was actually going to try this on the background some time ago, but it kept coming out black and I gave up in order to move on. After looking at a few tutorials, AO is a pretty easy thing to render. Initially, I added it to shot 12, which has been my main test shot and I was surprised how much I liked the results. It's just adding subtle shading to the crevices and geometry that gets close or touches, but it is quite effective and adds another layer of depth to the visuals. Spookie can get a little dark if I'm not careful, but I like it on him as well. The background definitely gets dark, but I do like the depth. I spent the past few weeks rendering out AO passes for the characters and backgrounds for every single shot in this sequence. About half of the shots I re-rendered pretty much every element since I was going to vector-blur instead of 3dblur to save render time. While I am pleased with the results and can see the difference as an improvement, I'm not quite sure just how much "better" it looks now. Going back and forth between AO and non-AO versions of certain shots such as 11, 12, and 13, I can definitely appreciate the difference.
NOW WHAT ??!?! · 29 JUNE 2011
So I pretty much finished the goal I set last spring, which was to get the Hallway sequence done from animation to rendering. Of course, I wanted to finish that last year, so I'm six months behind. On the plus side, I worked fairly consistently, even with supercrunch at work and did all 14 shots in 16 weeks. That may have been faster if I wasn't mainly doing this on the weekends. I wouldn't call it final because there are some obvious gaps where the other two sets need to be comped in and may require lighting adjustments. However, every shot has been touched in one way or another. I actually finished last Thursday, so this feels a little anti-climactic, but it is a pretty big milestone. At this point, I am not quite sure where to go from here. There is so much more to do. I was planning to publish this as a work in progress, and while it has mainly served as a production site for me, I always wanted people to be able to see where shots were at and what stages they are in. The danger is that I give away the whole plot, not that it's anything super-special, but it's always nice to leave some mystery. I could edit the shot page to remove the kitchen sequence for online, or not post those layout videos and thumbails. Unfortunately that kind of defeats the purpose of having it as a work in progress public site. I should probably fill out the character section of this site as well before publishing it, though it isn't completely necessary I suppose. As for what needs to be done and where to go from here, obviously finishing animation could be the easiest next step. That would be the longest and most time consuming, but is the most ready to be acted upon. Part of me wants to flesh out the other sets for some reason. Maybe so I can finish shots without having to completely finish animation. I will have to think on this more, but my gut tells me I need to get back animating. Off the top of my head, here's what needs to be done: 1. sq1 - animaiton 2. sq3 - animation 3. sq4 - animaiton 4. design, model, and surface tv room 5. finish modeling and surfacing kitchen 6. design, model, and surface crib room 7. create cookie commercial or license one 8. sq1 - lighting and comp 9. sq3 - lighitng and comp 10. sq4 - lighting and comp 11. sound and music Well, now that I've written that out, doesn't seem daunting at all. Shouldn't take more then say...another 10 years ; )
TURBO BLUR AND IFF · 11 JUNE 2011
I had been using Targa format to save all of my Maya rendered frames. However, Maya doesn't save them compressed so each frame is a about 3megs. Multiply that over several frames, passes, and versions; and one shot quickly gets several gigabytes of data. While my new system has a large drive and I can always buy another, I still want to be conservative with space. Usually after a render, I try to compress the frames. You see a huge difference in matte pass where one frame goes from 3megs to around 100kb. It gets quite annoying trying to remember what shots and passes I didn't compress if too much time goes by. I was having a problem rendering a z-depth pass and changed my format to Maya-iff. To my surprise, this format automatically compress the file. Not only will this save me space, but also the time and headache of going back to manually batch compress frames and passes. I think I avoided this format before because certain programs had problems with it. Toxik likes it, so I'll be using it from now on. While my character passes render very quickly without motion blur, turning that feature on usually adds an hour or two to the render. A few of the last shots have added huge render times. One batch of 20 frames took over three hours, and the entire shot took almost 8 hours. While I can render over night, this isn't very productive. I had looked at doing blur in comp before using the Maya 3d motion blur pass, but wasn't that impressed with the results. I had been meaning to look at Real Smart Motion Blur for AfterFX, but when I started comping in Toxik, and my render times weren't too bad, I sort of forgot to follow up. Well, this recent batch has forced me to revist the topic, and I wish I had done this two months ago. I think that whole lm2dmv shader kind of scared me away. Little did I know, it's been built into Maya since 2009 and very easy to apply now. So, I downloaded the trial version for Toxik. The results are fantastic and it works with fur, another fear I had. With the exception of bgs, all of my render times are very fast without 3d motion blur. The comps take a little longer to render, but we're talking 2-5 minutes. The results look even better then straight 3d out of Maya, have some flexiblity in control, and the time savings is HUGE. Here are the first two shot to use the Real Smart Motion Blur with vector pass out of Maya:
BIG 1000 · 4 JUNE 2011
I started adding some stills to the media section after saving a still from shot 9.50. My current output for this short is 720p(1280x720) but my website width is 1000 pixels wide. Right now I'm just displaying the 720p still at the full width of the site, so it shrinks a bit. However, I really liked the way it looked and decided to change my large shot page to use the full width of 1000 pixels. Previosly I was rendering all of the flash videos at 800x500, so older videos will be scaled up, but moving forward I will be outputting 1000x625. It's funny how this site has been evolving over time, yet very few people have actually seen it. I like to document my progess and evolution, so I've put an image in media section of what the large shot page use to look like. The revamping I did earlier this year coding the page to be php made it super easy to change. I saved it as big.1000 and just pointed the normal shot page to that instead of the old one. If I every want to go back, I can do that with one simple link change. I'm five shots away from having the hallway scene completely rendered, minus the areas where the kitchen and tv room will be seen. At that piont, I hope to fill in some of the blanks on this site and start posting it as a work in progress short film.
TOO LEGIT TO QUIT · 31 MAY 2011
Even though I only have one real entry for May, I actually have been working on this through out the month when I have time. Two more shots have been lit and rendered as well as surfacing tweaks on the alien. I've also re-rendered the alien in each shot a few times. I have not been posting anything because my trial of Dreamweaver ran out and I had been contemplated which Adobe software to buy. Originally I needed AfterFx and still do, but since I started comping in Toxic, which comes with Maya, it wasn't as urgent. AfterFx is fairly expensive, but the Prodction bundle is only a few hundred more which gets you Premiere, Photoshop, and some other useful programs, but not Dreamweaver. Adding in a lone copy of that brings the price a few hundred short of the Master Collection, which pretty much gives you everything Adobe makes. All month I kind of went back and forth over what to do until I got an email from Adobe stating a 10% off Memorial Day Sale. At that point I decided I may as well go for it and bought the whole sha-bang. I use Adobe software for much more then just this project, so it was a good purchase for me, but now I feel like I have even more reason to keep going on this short film.
THIRD TIMES THE CHARM · 28 MAY 2011
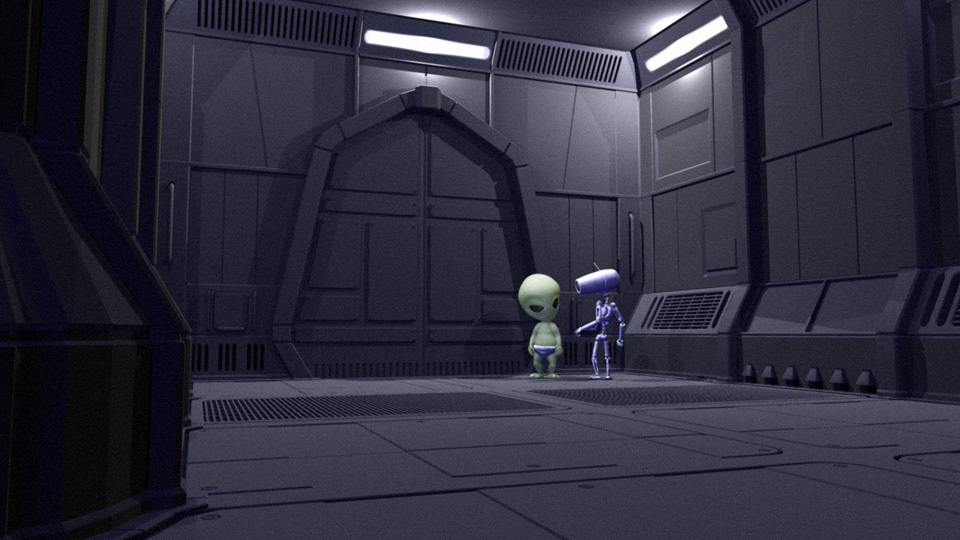
I was kind of happy with my first attempt at subsurface scattering last year, but I lost a lot of the color variation in the alien. Not that I had much to begin with or am very good at painting textures, but I wanted to try to get a little more of the original vision back. After watching a few tutorials, I put the color map into both the diffuse and epidermal texture maps and tweaked a bit more. Looking at them side by side, I'm much happier with the results. The difference is somewhat subtle, but to me it's much richer and not as washed out. Hard to believe I stuck with the middle image for so long, and was basing all of my current shots off of it. Of course, this means I have to go back and re-render all the shots with this character in them. However, since I'm rendering in passes, it shouldn't be too bad.
CALLING ALL COMPS · 1 MAY 2011
When I started this site I wasn't sure which stages would require their own versions. I originally had both lighitng and comp, but it seems that is a bit redundant for viewing. However, I do still have different versions for both lighting and comp. Since I am rendering many elements, and never really do a single pass render, a seperate section for lighting isn't very practical. Plus it gets confusing since I'm rendering frames for comps with different version numbers from the lighting stage. In addition, a comp may be comprised of many lighting elements each with different versions since I don't re-render every pass each time I version up. For instance, I may have a bg as v16, but the chars are v18 with motion blur. The comp might be on v3 and sometimes I may just do a color correct to match another shot with no need to render light elements. After doing six shots and naming them after the highest lighting version, even though they were actually a comp version, I have decided to remove the lighting button in favor of just a comp button to make the version match the actually source. One of them had to go, and it looks like comp makes more sense. I also started to try "Fine Trace" on the bg renders. It is quite slow compared to normal production mode, but makes many straight lines look much sharper. Basically two versus eight minutes per frame. While eight isn't that long, considering I don't have a render farm, some shots can take up to a whole day just for the bg. Most of my shots have static cams and since I'm already comping in the character shadows, I did a quick test on shot 12 to see if comping in the reflections on walls would work. Visually I can't tell the difference, and the time savings is huge. 2 hours versus 28 for shot 12. Shot 09.50 was the first one I tried fine trace on and it took around 16 hours to render the bg. That's do-able if i set up a render before I goto bed and then work the next day, but I think I am going to render stills unless I have camera motion. I'm pretty happy with how this shot turned out at full res with regard to the bg. I think it's a combination of fine trace and depth blur.
SUPER CRUNCH MODE · 26 APRIL 2011
After one week at our new office with "normal" crunch mode, 10 hour days, we are going to 12 hour days with possible weekends. This will probably go through May and perhaps June/July. A little scary, but I always knew this could happen. I just hope that I don't lose too much momentum on this project. We've been doing crunch this entire year already, with Fridays being normal, but now they will be 10 hour Fridays. The weekends are really when I get the most done on this, but if I'm too tired or burned out from sitting, it could derail again like last summer when I was animating Doctor Kvasir for the Rage.
OFFICE SPACE · 21 APRIL 2011
This week we moved to our new office which makes my drive to work about 15 minutes longer. Since we are also still in crunch mode, I'm getting home super late these days, not sure how I feel about all this. Definitely don't have much energy to do much other then simple comping after hours. I did manage to set up one more shot before the weekend was over and render it with motion blur on Monday. In this shot, the characters are probably the smallest they will ever be. I remember animating the alien and teddy bear almost two years ago and was very pleased with how they turned out for such a long shot. Unfortunately, I'm not that pleased with how the lighting turned out. It's difficult to light from so far away for some reason. I will probably revist this shot, but for now I think I will move on to some of the others.
THE DEUCE · 16 APRIL 2011
I really like these two shots. They share pretty much the same camera and lighting setup, plus they are short so I was able to knock them out pretty quickly. A few problems with the fur showing black spots, but I can probably paint fix that. Overall the fur looks really nice in this closeup. I also added a lighting video for the entire sequence with mixed animation for the remaining shots. I always like seeing work in progress like this. It's great when it's playing along in openGL and then all of a sudden a pretty lighitng shot comes on.
MOVIN' ON · 14 APRIL 2011
Definitely going a little faster with lighting and rendering. I'm focusing on shots that share a similar angle as shot 12, that way I can transfer character lighting setups and just tweak from there. Still requires a bit of work and testing but all of the shots in this sequence are shorter then shot 12, so at least they render faster. Also came up with a work around for the flash "slow playback on short videos" bug. I'm just duplicating the shot as many times as needed until it's around 200 frames. Not efficient, but it works. Hopefully this weekend I can get a few more shots lit.
ONE POINT FIVE YEARS LATER · 12 APRIL 2011
When I look at some of the dates on these shots, it is amazing how long I have gone between stages, or even just one shot to the next. This shot was last touched on Aug. 2, 2009! Well, if I can keep lighting up, it might go a bit faster now that I have a basic look and setup established. Still requires tweaking and can be slower from another standpoint...render times, but in other ways it can flow faster. While I don't do lighting and comping professionally, I have always liked this part. Probably because you get to see some pretty pictures and not just openGL playblasts. On the other hand, it's a bit scary because things may not look like I had originally planned. At this point, I just need to keep moving forward. I'm leaving shot 12 the way it is for now and moving on to 11 and 13 since they are more or less the same setup and angle. Discovered the flash bug from earlier this year seems to be worse. It just doesn't like shorter then 120 frame shots, but now it seems I'm having to make 200 frames in order for it to play smoothly more then once.
RENDER CRAZY · 10 APRIL 2011
Usually when I don't post for a while it's because I'm not working on this project. However, this time I have actually been working during most of my free time - which is fairly limited these days. The reason I haven't posted is because I broke down and bought a new workstation class computer and am just now installing a web creation program. My old system is still very good for animation, but it is limited in memory and cpu power. This new one is a dual Xeon quad core, which brings me to eight cores vs two on my old system. I only have eight mental ray licenses, so that works out. It also has 12 gigs of ram and is a 64bit OS. Rendering is so much faster now and motion blur doesn't crash. I've been experimenting with 2d post vector blur as well, but I think I prefer 3d. It is much slower, but not too bad. In the past two weeks since I've had this system, I have been throwing many renders at it. Still the same shot, just trying to work out little kinks here and there before I go wide. Fixing UV problems on both characters and adjusting the overall surface look of the mark one robot, seperating passes for the alien's eyes, mattes, etc. It's a lot of work getting it all setup. I think I picked the longest shot of the 14 in this section too, whcih makes rendering longer. Now that I'm knee deep in it, I don't want to switch to a shorter one though. I was planning to get the new AfterFx now that I'm 64bit for compositing, but since Maya comes with a comping package called Toxik, I thought should give it a go. After a few hours of getting use to its workflow, I am really digging it. It's a node based compositor like Shake, Nuke, and Digital Fusion. While I've used them before, I've always just relied on AfterFx layered method for comping. I am finding node based to be much better in many ways, especially for what I am doing. Still need to use AfterFx for many things, but I think I will comp the shots this way first.
SO IT BEGINS · 19 MARCH 2011
I figured I had enough base material to start lighting a real shot and tweak surfacing from there to see what I have. My renders are not too slow except for the background which takes quite a long time with all of the area light shadows. I'm not quite sure it's worth it or not. The big hiccup was the fur. I was using the volume method with mental ray and ray traced shadows which seemed to be fine for my stills. However, maya kept crashing and locking up. I had to go back and do some research. Couldn't figure out if it was because I installed 2010 or what. Eventually I did some maya software tests which looked good but had the jagged matte edge problem. Went back to mental ray and got it sorted out with detailed shadow maps at 6k with 6 samples to avoid flickering. Also had to import my references for the furred teddy bear since it was causing a five minute slowdown between frames in batch render mode, even if the fur was off. The fur actually renders very quickly once it gets going. Just getting through the initial setup was painful with all of the crashing. Seemed a little unstable. Took me a week of working at night after crunch time hours to get to a render which I can determine where to go from here. After going through all of that, I am considering buying a new computer. Seems like I just go this one which has been great for animation actually. However, even doing 640x360 test renders can take some time and doesn't give you that great of an idea of how the final will look in terms of surface quality. I notice a big difference in the characters when going from that res to 720p. I bought this computer in Sep2006 and while it's great for general working, when I get to rendering shots and elements, it could be a very slow process. My main concern is upgrading ram or getting a new version of AfterFx since it only runs on 64bit OS now.
LET THERE BE LIGHT ICONS · 13 MARCH 2011
Finally started lighitng a real shot. Right now it's just a still, but I have added a new icon to the shots page for the very first lighting page! A lot of problems to be worked out, but it's good to move forward on this. Since this is really a retro post, most of what I want to say about this stage is above. click icon to view stage
LIGHT IT UP · 6 MARCH 2011
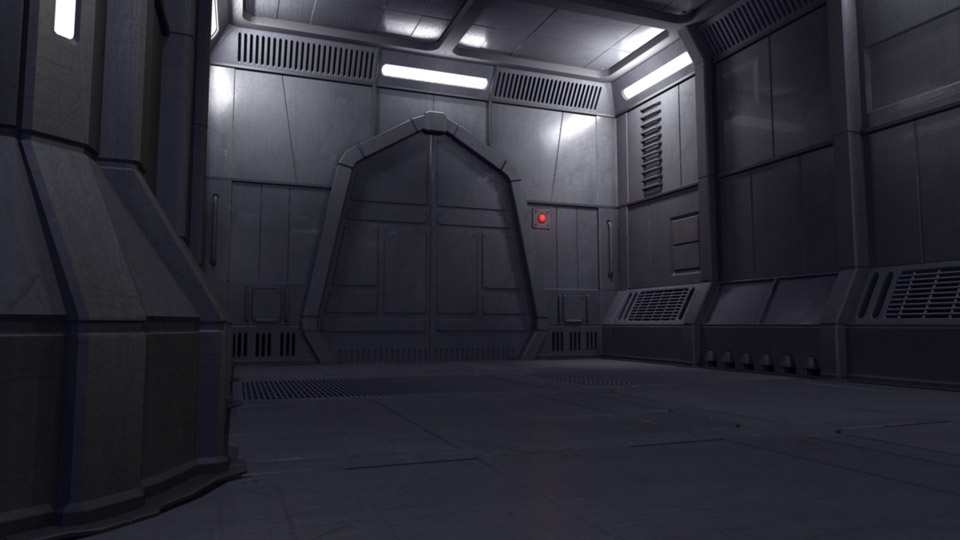
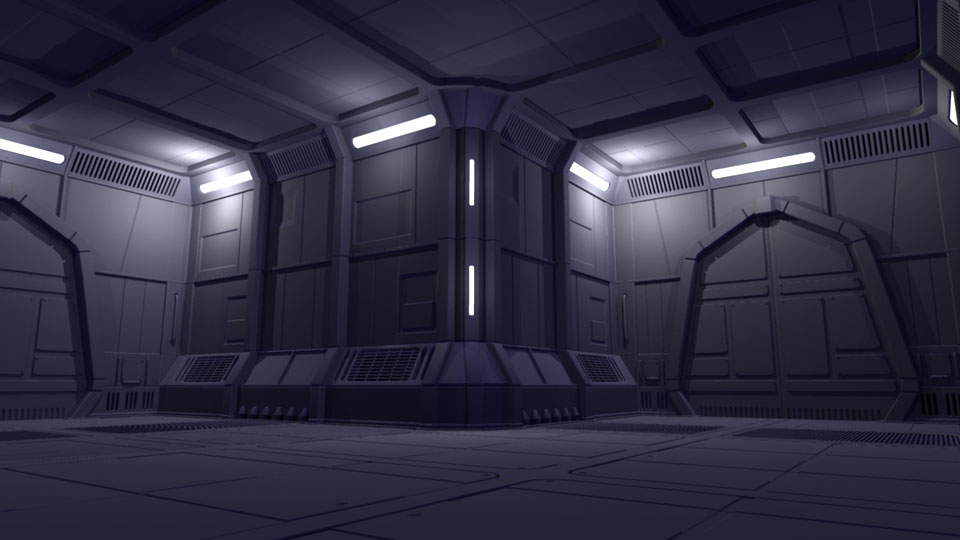
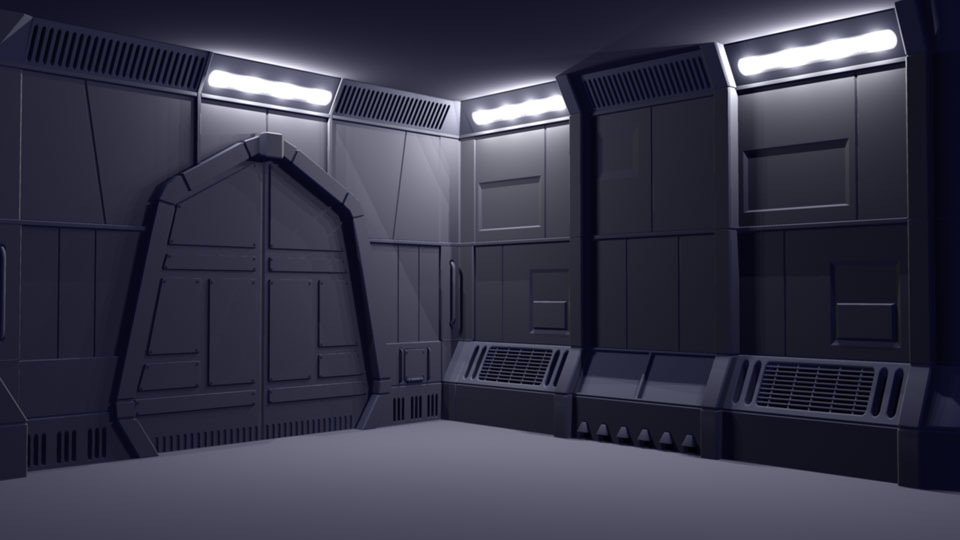
Actually, lighting and surfacing. Started working on the surface and textures for the the hallway set which is always a big unknown for me. Before, it was just flat color with basic lights. I'm trying to get some nice pools of light and have the walls not look so boring. I was actually pretty happy with the old render, but now that I have some surface properties in and some metal like textures, the hallway is looking a little more interesting. I switched to area lights and volume lights which I knew would be slower to render shadows, but I do like the effect they have. Still will be a shot by shot basis, but this is a pretty good start.
I also put the button in. It's a little tacked on, but hey, I need to move forward on this thing. Spent some time cleaning up the character rigs as well. Disovered that you can have mesh smooth built into the meshes instead of assigning a polysmooth. This works soooo much better then what I was doing and is almost identical to how they behave in Lightwave, the program they were built in. It even looks nicer in the the display for wireframe and just shows the curves instead of each face. The big advantage is being able to adjust uvs without destroying the smoothing. That wasn't a big problem with the alien, but the robot has so many peices, each time I had to adjust a uv, I'd have to delete and reapply the smoothing, as well as hook it back up to the vis controller. Quite a pain.
I am inching my way closer to being able to render a real shot. Not quite sure this will be the "look" that I invisioned when I started this project so long ago, but at this point, I really need to just move it forward so I will have something to actually adjust and mold into that "look."
PAINTING · 20 FEBRUARY 2011
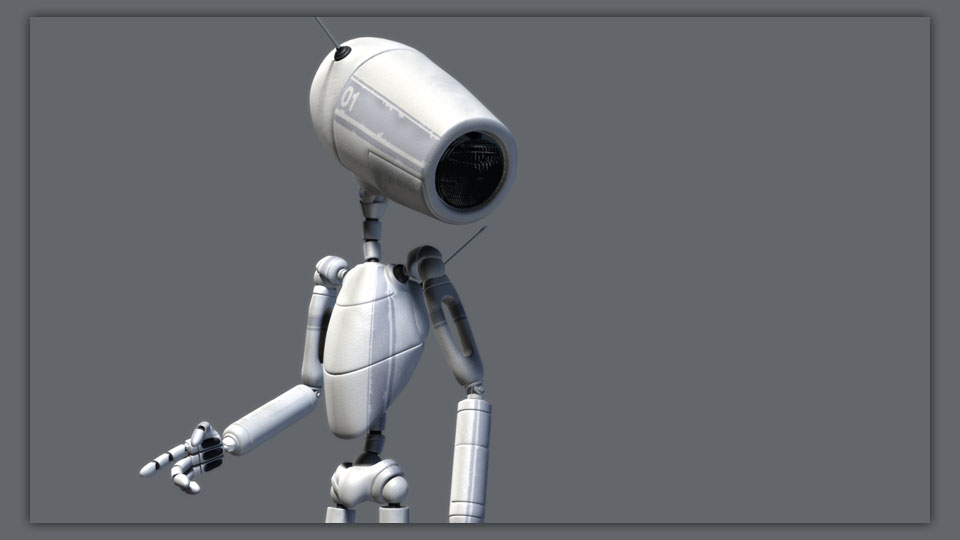
After spending the weeknights and some of the weekend laying out UVs(my least favorite thing to do), I started painting and surfacing my Robot character. I'm not a very good texture painter or too adept at shaders, so I have been putting this off for a long time. It's always scary to do "real" surfacing because it probably won't turn out like I hoped. I have looked at a lot of great inspirational images and even have a folder of them, but getting the right look is very tricky. I am going for something along the lines of hard white plastic and scratched metal. I did a 1080p render of the below image which I was actually so pleased with that I made it my new background image for my desktop. Of course, now I feel like my little Alien needs some luving to get the surfacing to feel like they are part of the same world.
SKY'S THE LIMIT · 13 FEBRUARY 2011
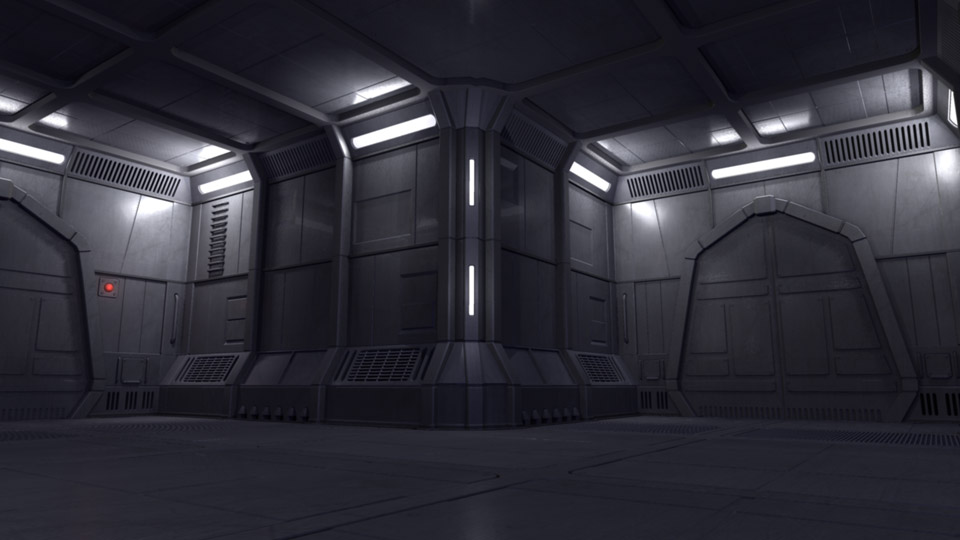
We had a few ice days over the past two weeks which actually made the studio close. Given the extra days and lack of football, I went back into working on the hallway set. This time I put the ceiling in and started working on some more test lighting. I don't want to go too far trying to light the set from the below angle. It might look alright from there, but from different angles it becomes a bit flat. I will have to adjust on a shot to shot basis. Having the basic sources in is a good start and I will do character specific lighitng as well. I still have to add the button and I'm thinking about simplifying the doors, but it's starting to take shape little by little. For now I'm going to leave it unsurfaced and work on the Robot's textures. Started laying out the uv's tonight, something I dread. Below I put the new ceiling and floors render next to the old pic again to see the quick difference. Adds quite a bit even though it might only be noticable in a few shots.
FLOORED · 5 FEBRUARY 2011
Finally jumped back into modeling. I spent quite a bit of time over the past few days working on the floors. Base boards, floor boards, trim, grates, lines. Not exactly difficult, but time consuming. I'm also making this set rather module so that I don't have to build every square inch of it. I have forced myself to use the grid to be more precise and make sure things line up correctly. I figure I can go in and detail the featured sections a bit more depending on how it all looks in the sequence. So much effort on the floor alone, yet it won't really be seen that much. I also did a little bit of test lighting just to see how all of the lines looked with shadows and characters in the scene. Probably going to do the ceiling next. Once this set looks good in grey with lights I will probably move on to surfacing the robot character.
NEW YEARS'S RENOVATIONS · 1 JANUARY 2011
Another year has come and gone. Seems like I was just writing about it being 2010 already and now we are at 2011. The last three months of last year were not very productive for various reasons, as well as several during the summer. I accomplished a few things I wanted to, but kind of hit a wall when I moved on to modeling the hallway set. Hopefully this year will see some visual results which might give me inspiration to move a little faster. One thing I did spend some time on during the last few weeks of December was the way I handle my shot pages. I actually (finally) published my main site and had to learn a little php coding in order to use a few variables for choosing video formats. This got me to thinking that I could create my shot pages in a more dynamic (and easier) way. The shot page was the first thing I designed for this production site in photoshop. I knew that it was more or less a template that 50+ shots multiplied by 4 to 5 different stages would share. However, I really did not want to get much into the coding aspect of web pages and decided to create them by brute force. In other words, each shot for each stage and even each version got its own unique page. Not a very efficient way to work, but it did work. Not without problems though. Mainly, every time I increased an animation version and published it to the site, I had to deal with creating new pages for the previous version and manually linking all the versions together, copying notes, etc. Plus if I wanted to do the "large" format video page, I needed to add one for that. While it worked, it created a lot of headache. Not to mention all of the layout pages did not have "large" versions. I decided that with my new found php coding skills, novice as they are, I could create animation shot pages which would dynamically link to the correct version. I created a bunch of extra variables for what I thought might be useful such as the shot number, stage, and even the directory path. It wasn't too tricky to get the page to dynamically link to the correct version which let me make the video link dynamic as well. Thanks to naming conventions I've learned to use over the years at places like Sony Imageworks, it was very easy to consistently pass variables to links and get the correct files or information loaded. I even made it so the "play large" button is just linking to a single page. While this is something that no one would ever notice by just looking at the site, I was quite estatic with the optimization. The first round of coding eliminated around 28 redundant pages where the only difference was the version of the shot and video. However, this got me to thinking, why not make the entire animation section dynamic? Which lead to, why not make the entire page and menu system dynamic? After a little more coding research, I was able to make every aspect of the page dynamic. In essence, I have one shot page and one large video shot page. I do have an info page for each shot and stage, but it is so much easier to maintain and update. It was quite a bit of work to convert the entire system, but in the long run, much cleaner and easier to work with. I went from over 230 pages that needed to be mainted with regards to links and versions to just 2. Even though I have to maintain a few data base type pages, it is so much easier adding new shots and versions. Now I just need to start "making" the shots. |
|||||||