MAYA NON BINARY · 26 DECEMBER 2024
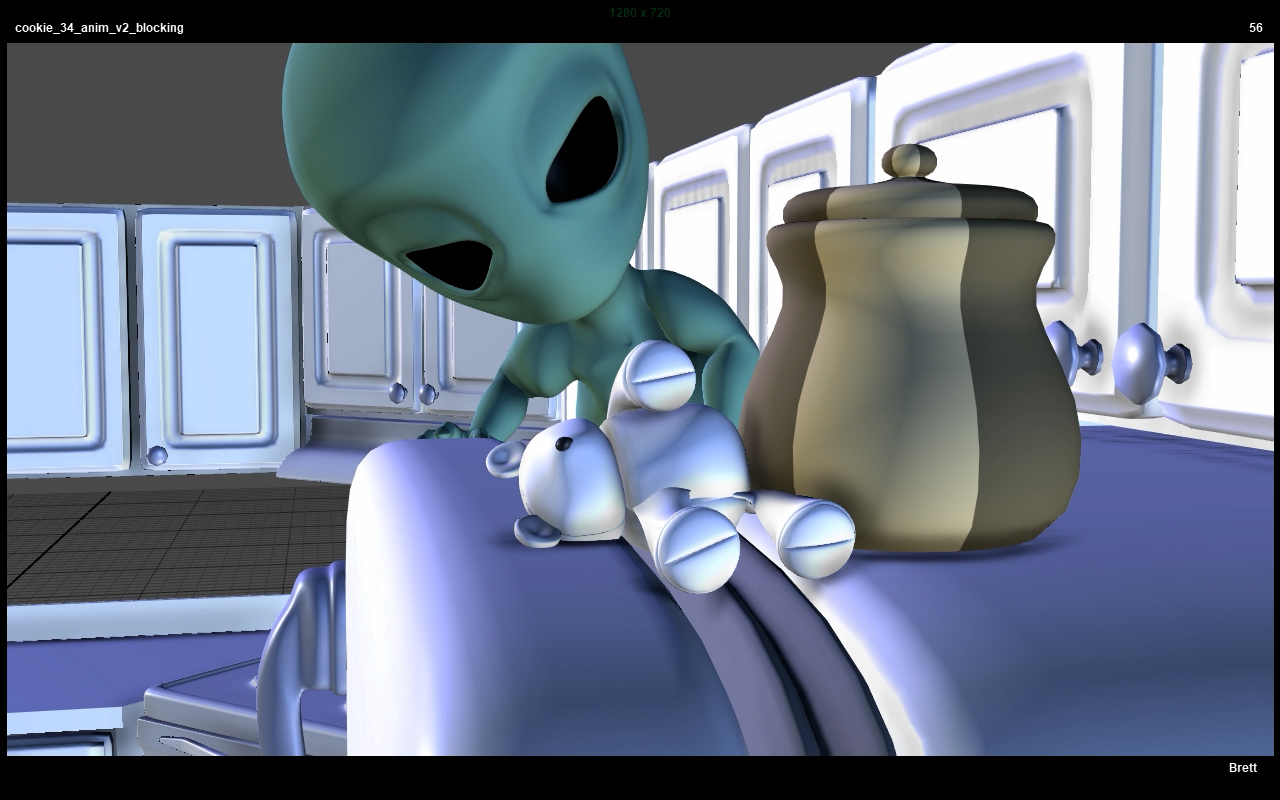
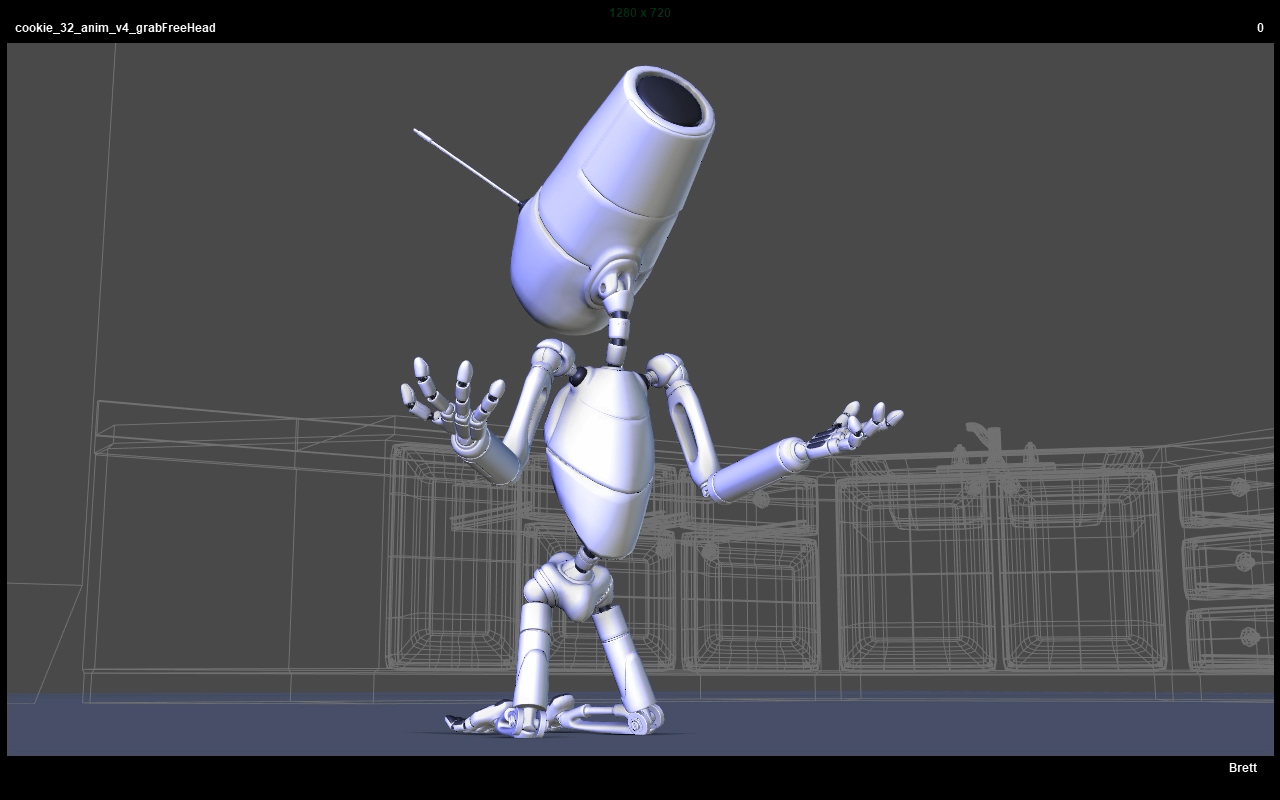
All of my Maya scenes for this project have been in binary format. However, over the years, I’ve learned that Ascii has the advantage of being able to fix things via text editing in a pinch. A few months ago I wrote a script to backup a loaded scene and then save it with the same name as whatever format you want, then remove the other format to clean up the directory. For the most part it worked, but I didn’t really go through all the scenes. Well, I finally bit the bullet and did a big batch conversion of the entire project to get all scenes into Ascii format while leaving the rigs in Binary format. Because I version up a lot, this isn’t just one file per shot or discipline but more like 5-10 per discipline. Took a while to go through, and there are some hiccups converting formats, but overall seems to be working as intended. Just took time to go through. Also managed to do a bit more work on this shot. Added some secondary and fridge motion as well, which has opened up another can of worms.
ONE SMALL LEAP · 19 DECEMBER 2024
Lost all of my momentum after converting the characters to game ready rigs back in September. Still haven't tried them in-game because I don't want to get too caught up with that. Since I have some free time on Christmas vacation I want to try and make some more progress. I usually have these big plans to do one shot every few days and then end up doing very little or nothing at all. For now, I skipped a shot that was blocking me mentally because I would have to model and rig a better toaster and it's preventing me from getting started. I decided to just pick shots that are fairly short and ready to go so that I can at least knock something out during this time. If I manage to get through 2 shots in 3-4 weeks, I'll call that a success, even though I know I can do more.
DON'T FORGET ABOUT ME · 8 SEPTEMBER 2024
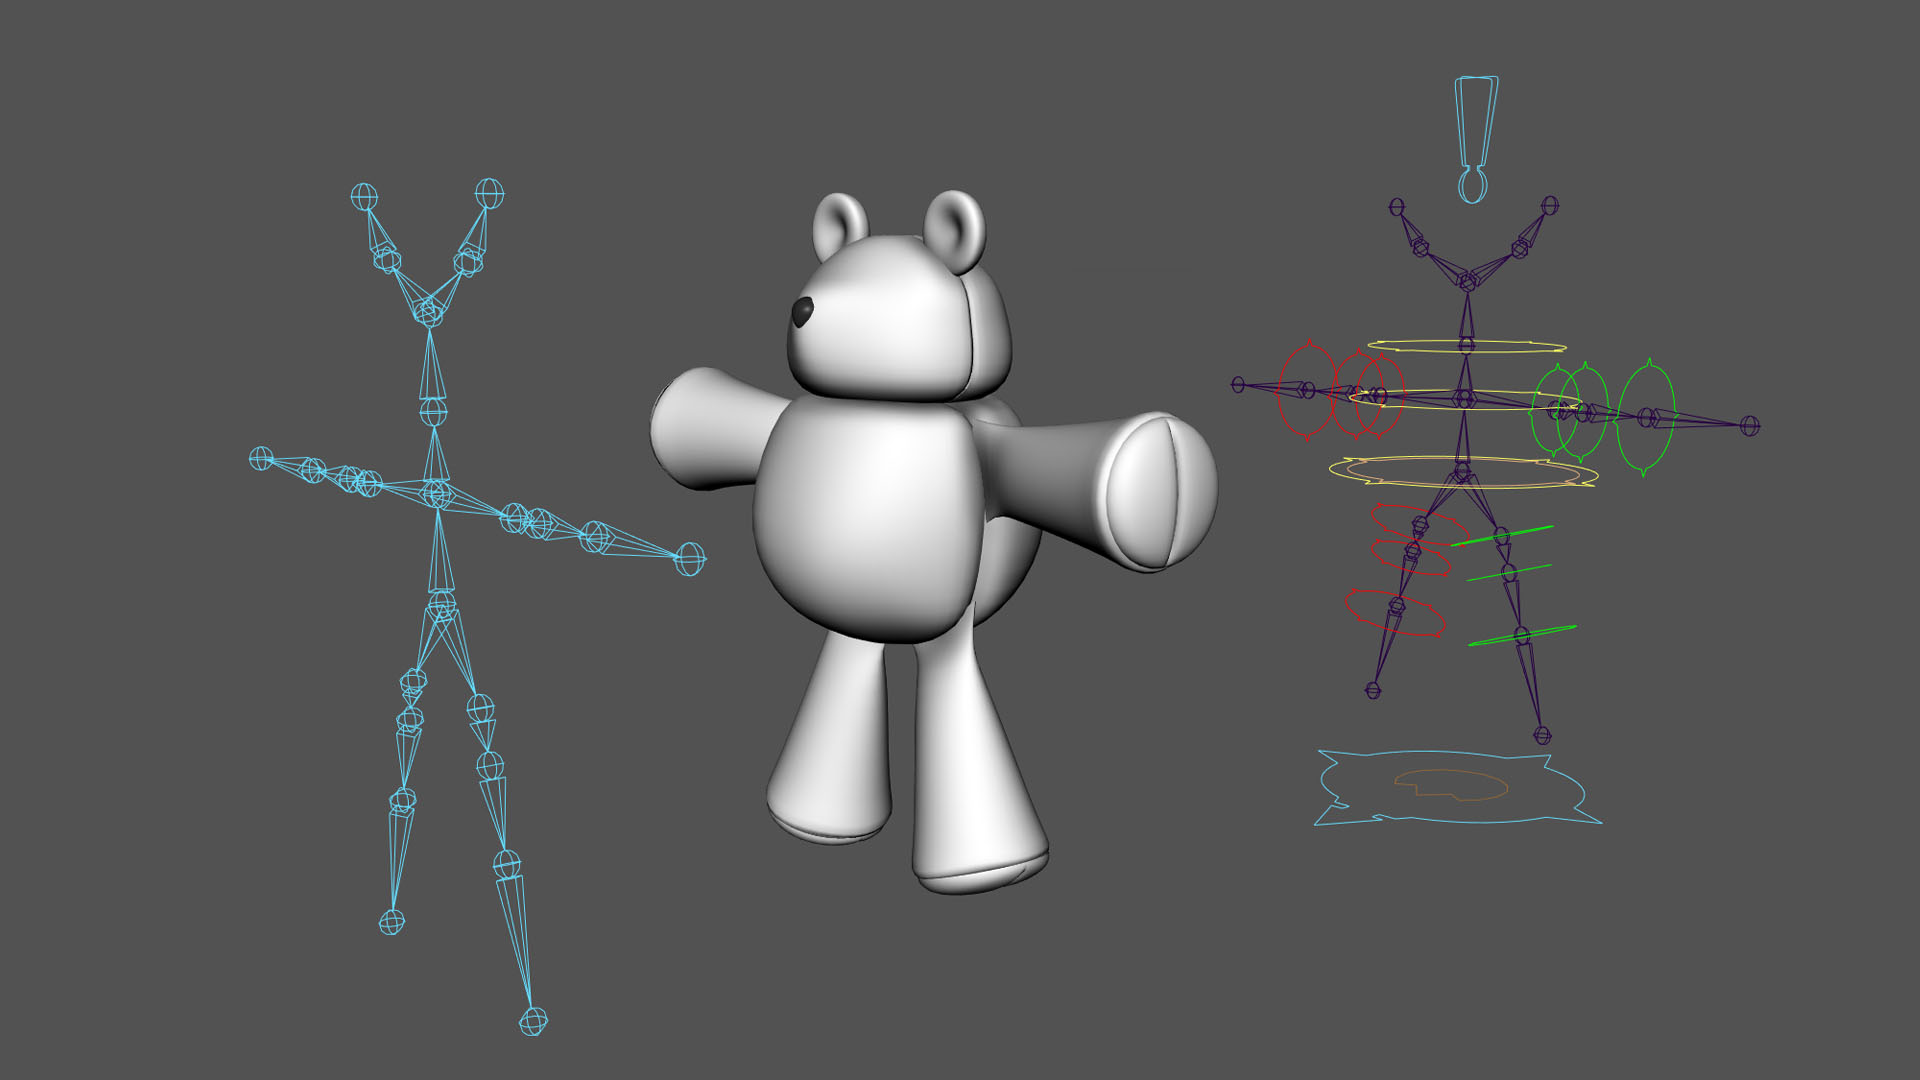
I wasn’t going to redo the Teddy as a SkeMesh style rig, but since he was the last character, I figure I should get all 3+ on the same system. His rig was actually the simplest with no extra nulls inserted anywhere except an extra null at the top of the hierarchy chain. Very straightforward to separate from the control rig. Of course, there’s always a hitch. I originally used nurbsSurfaces for him because the Maya fur plugin worked really well with them. However, I discovered today the copyWeights doesn’t seem to work on nurbsSurfaces. At first I thought is was my SuperReSkin64 tool, but turns out it’s just been that way for a while in Maya. Since this character is so simple, I was able to just remove all the controls rename the joints and then save it out as a SkelMesh. I then cleaned out the surfaces from the main file and recombined them. Modified a few control shapes while I was at it. I did add Origin(root) joints to all the character rigs and part of me wants to try some quick export tests into Unreal, but I really don’t want to get too bogged down with that. I’ve already spent over two weekends on this process, and while I feel it was worth it, these are the type of things that prevent the animation from getting done. Still, it’s nice to switch gears every now and then…like for 20+ years!
ONE RIG TO RULE THEM ALL · 7 SEPTEMBER 2024
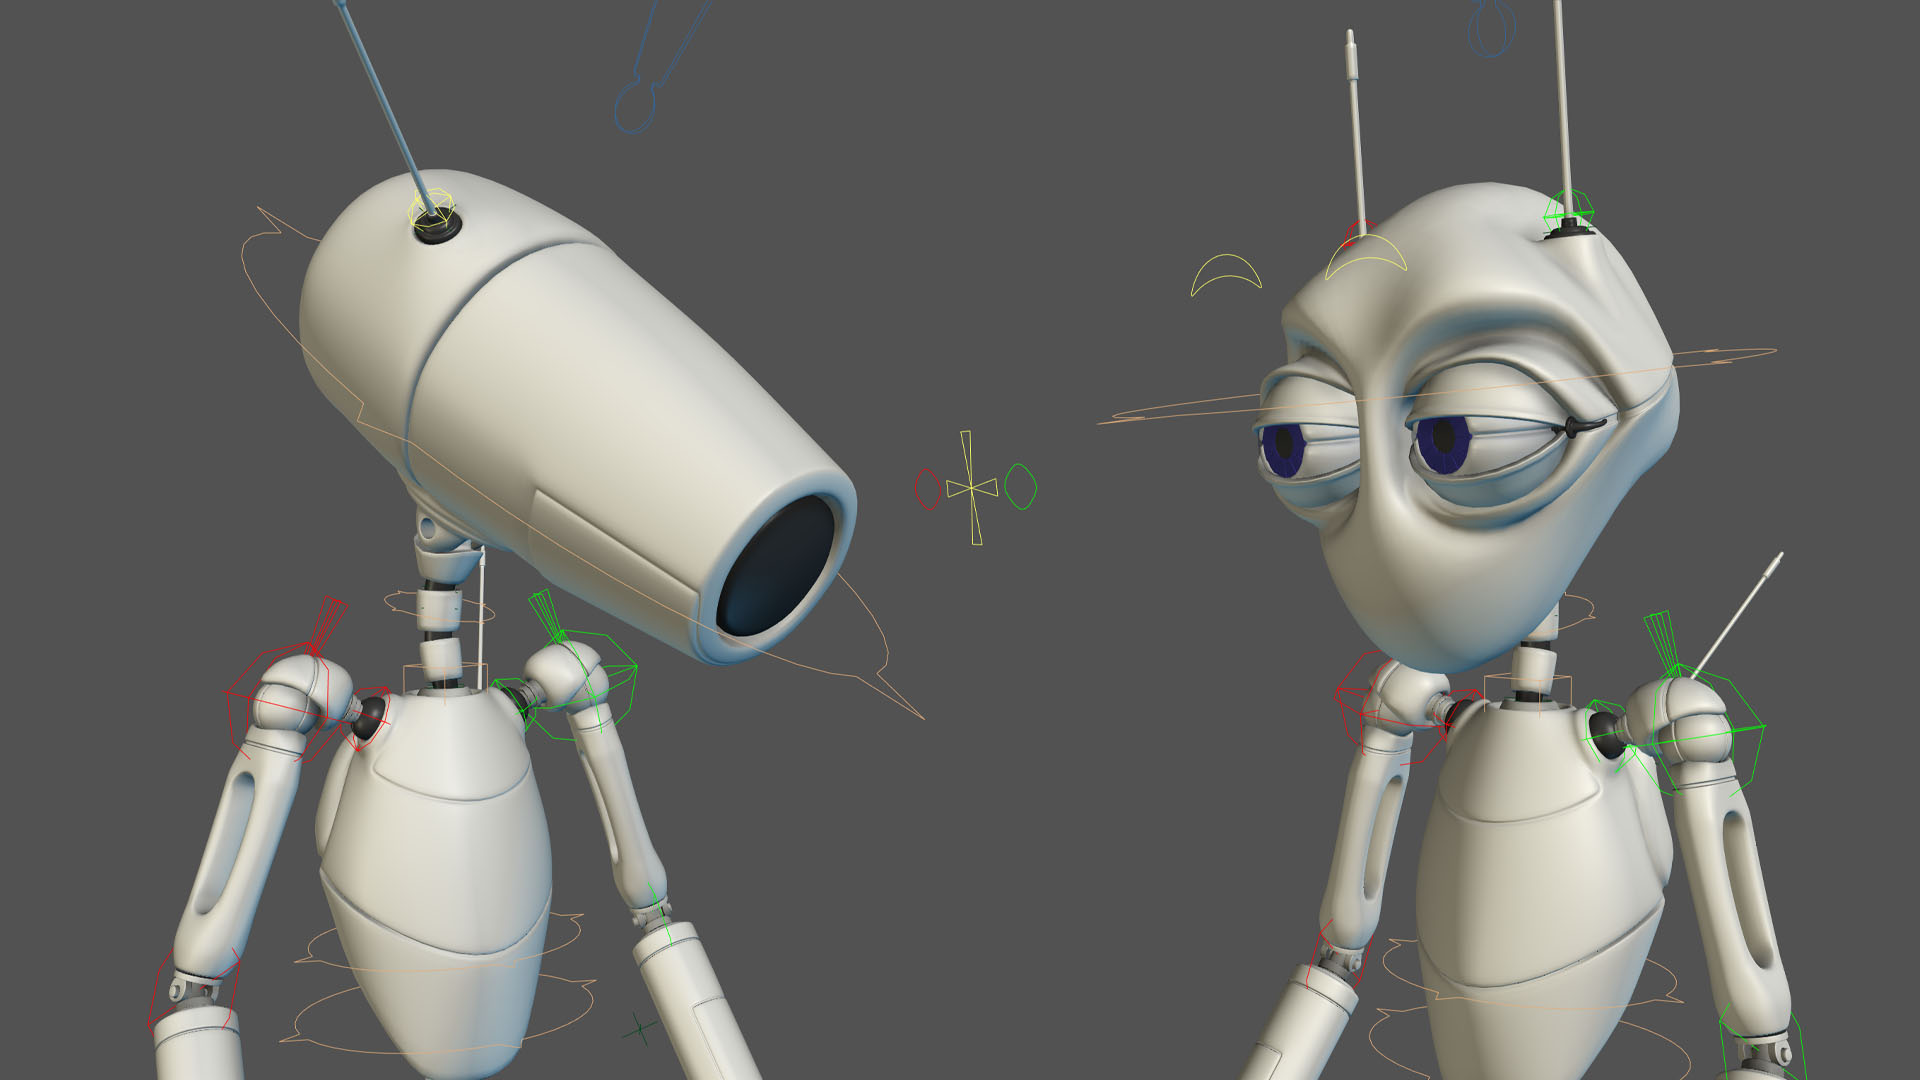
Way back in the early 2000s, I created an alternate head that I could do some eye movement with. I ended up using it for some animation tests, but not much else. However, when I was adding the new finger controls, I got a bit annoyed with myself that the Mk-II (alternate head version) rig was basically a copy of the Mk-I and I had to extract the head from one file, reattach the head in another, make sure all the controls worked, and basically re-rig it up to a certain point. While it was just the head, I’ve learned enough over the years to know that it could easily just be different skelMesh driven by the same rig, or even just part of the main rig. It’s been driving me nuts, so I decided to just bite the bullet and converted it into a skelMesh head that is now part of the Mk-I rig. A toggle attribute will switch heads and bring up or hide the appropriate controls for both the subD and proxy versions. A bit tedious because this head has lids, iris, and two antennas, but it felt worth it to do at this time. If I end up using Unreal, I’ll export one skelMesh for each version and then have one skeleton work for both since it only has a few extra joints.
SKELMESH STYLE · 31 AUGUST 2024
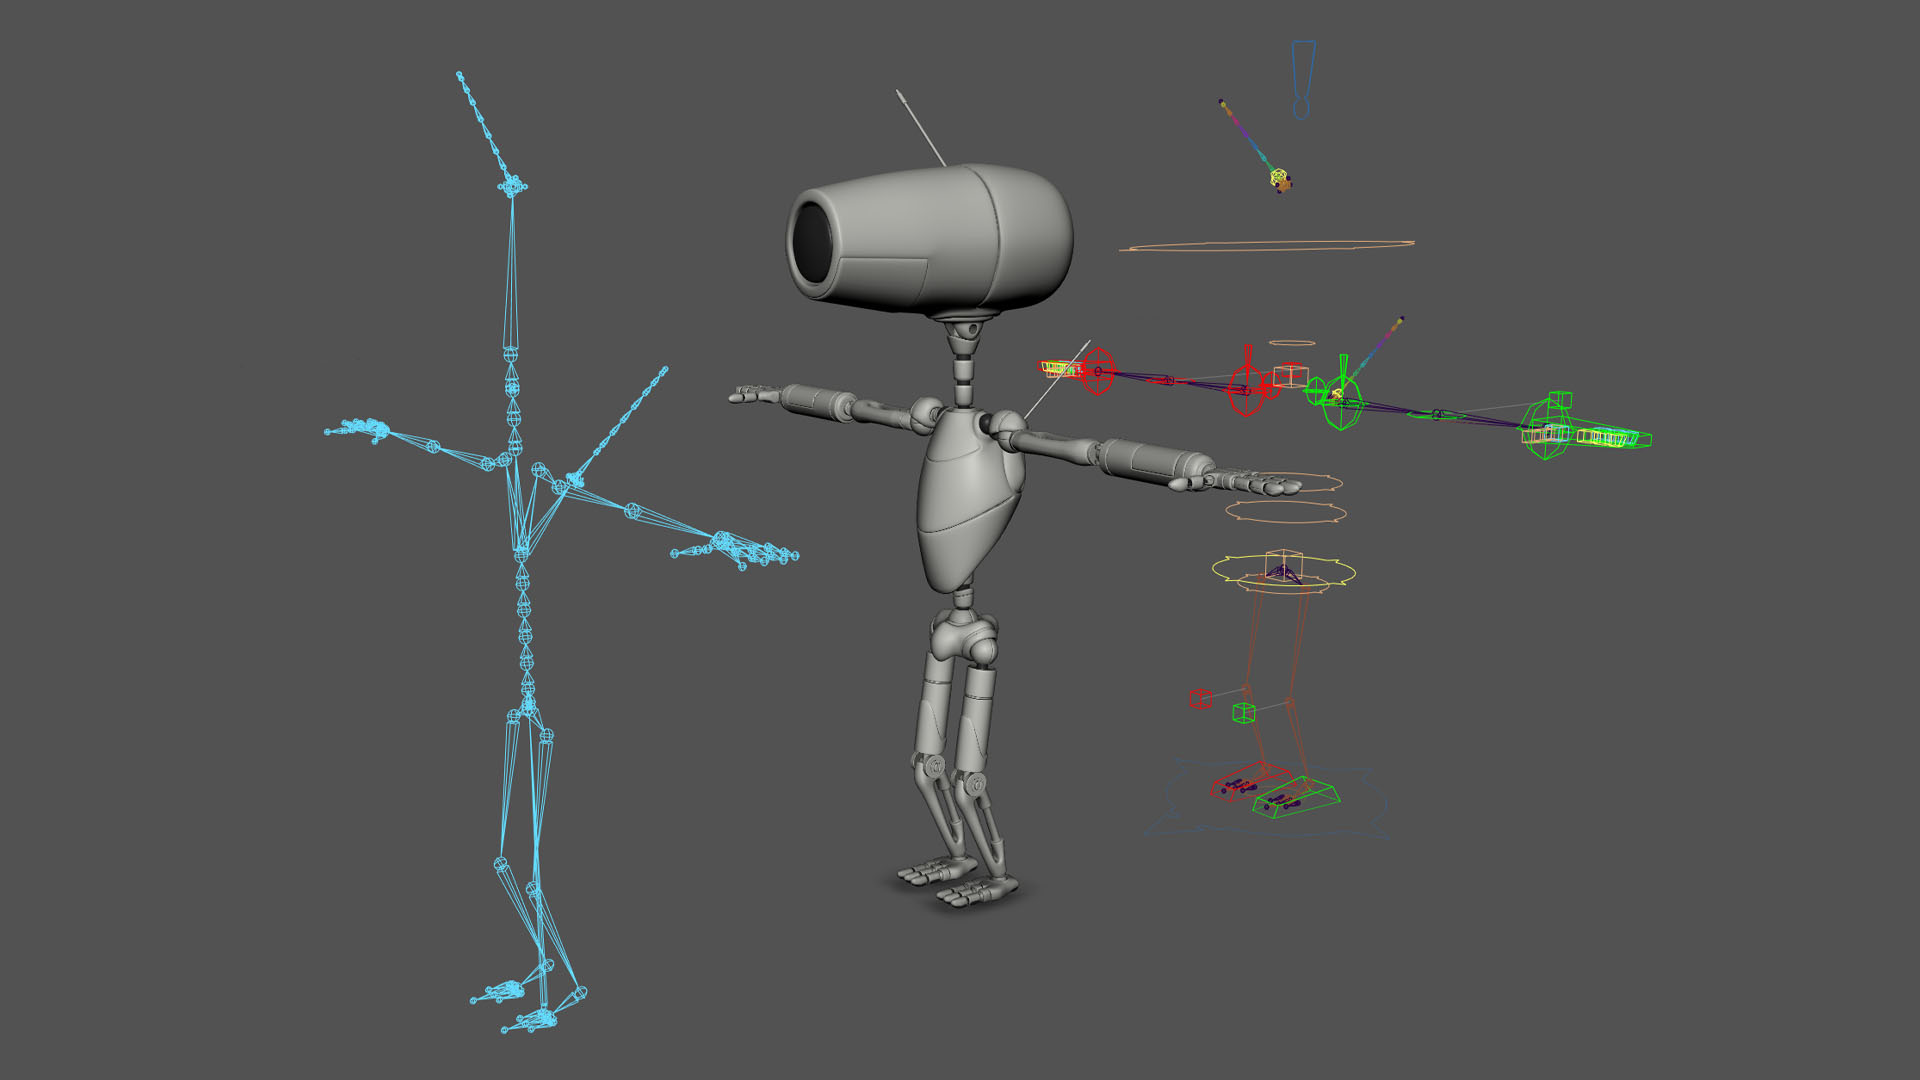
After converting the Alien character to a game-ready skelmesh style rig driven by controls, I decided to tackle the Robot Mk-I character as well. Since I had written scripts to make converting objects like nulls and locators into joints and removing multiple nodes from a hierarchy, I felt I should do it while it was still fresh in my mind. I also ended up writing a few tools to convert parented proxy objects to parent constrained objects or vice versa to make cleaning out the control rig a bit easier. Since the Robot is more or less rigid, I could skin joints 100% to mesh parts and was able to use a list based tool I wrote earlier this year designed to skin or convert multiple geometry meshes to joints. The idea behind this type of rig is that the skeleton is very clean and deforms the mesh, even if that mesh is rigid like a robot with hinges and sockets. Then your control rig with animation controls can drive that or similar skeletons. It does create lots of connections or constraints, but it is a very clean way of working. I have a driveJoints script that I used on the Alien, but that requires the joints be named the same, and the Robot character’s control rig doesn’t use too many joints. However, I was able to modify the skinning tool I made earlier to support constraints. In other words, I could make a list of the control objects and a match list of objects to be controlled and then constrain them all at once where the names do not need to match. Much faster than doing 100 pieces one by one especially when things go wrong. Even though I wasn’t planning to slow down animation to do this big rig surgery, it does feel nice to have the skelMesh separate from the rig. Makes it a little easier to augment or even change rigs later…hopefully a full rig change doesn’t happen. In this case I was able to keep the rigs working without too much hassle.
SKELETONS IN THE RIG · 25 AUGUST 2024
Because I’ve taken so long to work on this project, rendering is going to be a bit of an issue. Autodesk doesn’t make it easy to go back to old versions and I originally used MentalRay which is no longer supported. However, I’ve been thinking about using Unreal to render since I have a lot of experience with it now. That means either using alembic point cache type export or skeletal animation with blendshapes. These rigs are so old that they aren’t really setup to work in a game engine with lots of nodes in-between joints. Traditionally you want to have a clean skeleton that the mesh is bound to and then drive that skeleton with some type of ctrl setup. The Alien character was closest to that, but with lots of nodes inserted to make orientation of ctrls or joints work right. Having extra nodes can create headaches even though Unreal will convert them to joints. I decided to spend some time yanking all that out to end up with a clean skeleton hierarchy which would use the current rig to drive it. Seems simple enough but can be quite tricky to accomplish. I ended up creating a clean skeleton and skelMesh files from the main rig, then unbound the original mesh, brought in the clean skeleton, drove those joints with the current rig, then referenced in the skelMesh to copy skinWeights. Took multiple attempts and a few new scripts to get it to work right, but after I was done, I remembered my SuperReSkin64 script has a bug that makes painting weights after using it nearly impossible. It copies the weights fine and everything looks good in motion, but if you have to edit weights later, it seems to go bonkers. I spent some time figuring out what was wrong with that, fixing it, and reskinning the mesh so I can do paint weight fixes, if necessary, later down the line. I’m not really read to start testing in Unreal, but wanted to get one character closer to what that workflow might need. The Robot doesn’t really have any skinning, so I’m not sure how tricky he will be to convert. Just a lot of pieces, and I am slightly worried about Maya performance with so many joints being driven with constraints. Seems fine so far, but I may end up using two versions, one for animating, and one for exporting.
IT'S REALLY OLD... · 22 AUGUST 2024
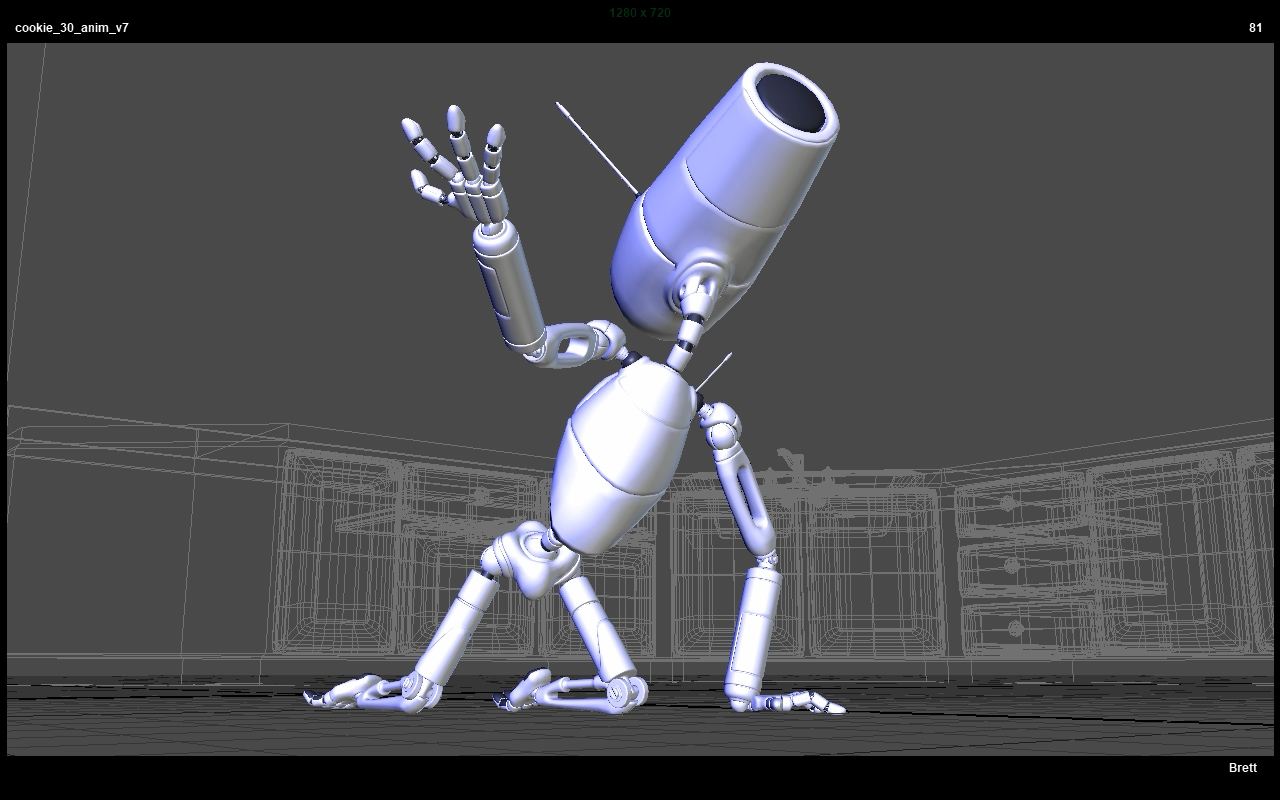
Decided to block a shot today, a weeknight. None of these are terribly complicated, but always hard to get motivated. I’m on a small roll though, so I want to try and keep it going. I wrote a tool a few years ago to make dynamic parent space switching constraints with a handy UI, but these rigs are so old, I couldn’t get it to work. However, I did build a grab “free” ctrl into the rigs for 2-handed ik setup, like when a character is holding something with both hands. So, what I did was just constrain that to the head ctrl and since I already have space switching to it for the ik hands, I just used that. Pretty sure I did something similar to a shot in the Hallway scene. The only downside is that it makes a blendparent. In this case, I don’t need to have that ctrl free so it works fine for what I want and I didn’t waste time fixing the rigs to support my newer tool. Trying to not get sidetracked with stuff like that unless I want to focus on doing a proper implementation.
SATURDAY HEAT · 17 AUGUST 2024
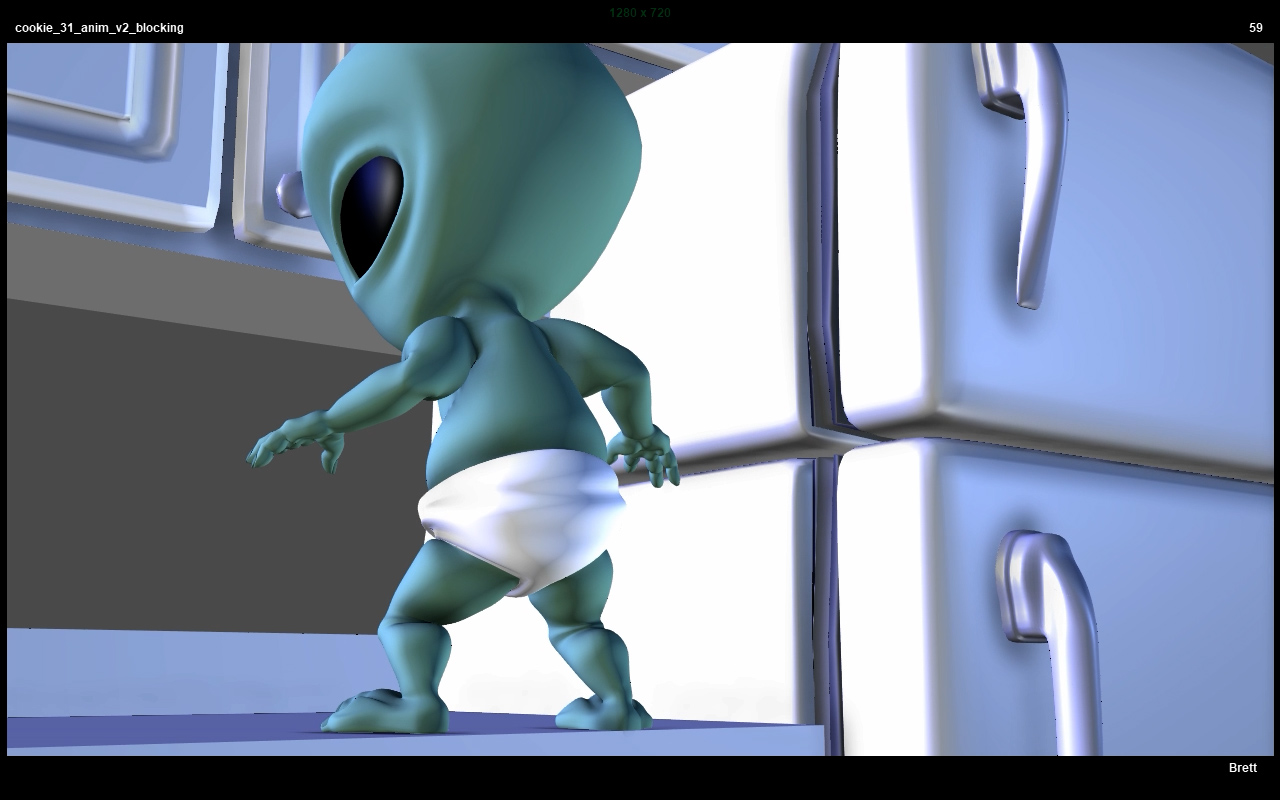
Thought I could work on this shot all week but ended up waiting until Saturday. Just a first splining pass. I remember when I planned these shots years ago, I wanted to make it easy so I cut just as the Alien starts to pull the drawers out and then back when he’s at the top to avoid doing a clunky climb. Probably could have come up with something, but I’m actually thankful for that decision now as it keeps things more manageable. Not sure I was purposefully trying to create easy shots that I could hopefully pull off, but it sure seems that way. Still, this should have been finished years ago. I might leave this one for now and move onto the next shot. Takes me so long to get motivated to work on this, I’m just thankful when things look semi-good. Perhaps I can take a big picture polish pass on things that stand out as opposed to getting stuck noodling each shot. Also worked on a script to convert Maya binary scenes to ascii, but copy the original into a backup folder, save as ascii, and then remove the old file. Tricky because a lot of scenes from older versions of Maya that are saved as binary get junk that must be removed first. Ascii is a lot more flexible to work with when stuff breaks or won’t open, bad references, etc. Binary on the other hand, you can just get stuck with. Suppose to open faster, but I’m not sure that makes a difference for this. Not sure why I originally used binary. Think I just didn’t know any better or was stuck. .
2 FOR 1 WEEKEND! · 11 AUGUST 2024
Well, sort of. Did some more work on the previous shot to make it feel a bit better and then started blocking the next shot in the afternoon. I usually don’t want to jump right into new shots and tend to let blocking sit at least overnight. I’ve always had a hard time starting new tasks, but once I’m rolling on one, it can move smoothly no matter how long or short. In this case, I forced myself to work on the next shot and almost got caught up in fixing a tool to work with old style Maya referencing. Most of my layout scenes are so old they use the old style referencing without true namespaces. I haven’t found an easy way to fix that yet if I want to copy poses from those scenes. My current work around is to make one of my turbo pickers and then manually edit it to add the prefix style namespace with an underscore and use Absolute Name Mode. Of course, that just makes me want to add an easier option to that picker which could take hours to days to vs just text editing the file in minutes… Ah well, probably throw in the towel for the weekend.
WINE AND SPLINE · 10 AUGUST 2024
Let this blocking sit for over a month. Oh well, I didn't drink any alcohol last month so there’s that. Had some wine last night so I guess that means I should do some animating. Not too much to say, just splining this shot. Definitely trickier shot than it looks... Feels a bit slow when I watch it in sequence. Probably need to speed a few movements up but don’t want to get stuck in the weeds either.
HERE WE GO AGAIN... · 12 JUNE 2024
Just making this post to show some progress. Started a blocking pass on this now that I have the correct rig in place and a few poses copied. This project takes really big haituses. I'm pretty much one track mind kind of person, so even though I have a lot of free time, it's difficult to switch gears from work project thinking to personal project thinking. I feel like the only time I gain momentum on this is when I have a lull with work or work inspiration and free time...and...the will power to get started again. It's a vicious cycle. There are more factors than that, but really I think that is the core issue.
TUMBLEWEEDS · 2 JUNE 2024
Getting back into the groove. Had to remember how to setup a new shot on this website. Takes a bit of effort to get a new discipline going with thumbnails and poster images. This isn't quite blocking either, just transfered some poses from the layout version to the new rig. The layout version was literally Rev01 and using the old style Maya referecing without a proper namespace. Had to use my list picker tool to make a quick way to select controls and copy anim curves one by one. A lot of the tools I've made over the years help convert some of these old files/shots, but of course if I had just kept at this project it wouldn't span multiple decades at this point...sad but true. Still, it is nice to have rigs and tools evolved over time as well. |
|||||||